Happy Birthday AiC, and an Easy Peanut Butter Chip Pie

A year ago today, I published my first post on Antics in Cooking, Spicy Sausage Pasta. Little did I think then I would still be doing this a year later. I started it as a way to chronicle many of the new dishes I was trying as I was really diving into cooking every meal, attempting to alleviate some of that stress from my wife. I was finding many of the recipes I was trying through similar blogs, which have been an immense help for me. 

I stand by the original description, still on the home page today, “…sharing terrible photos and awesome recipes, and having fun doing it.” I really have enjoyed it, and I still take really horrible pictures!

For the first birthday of the site, I thought I would share what I eat for my “birthday cake” for as long as I care to remember. I actually can’t remember when I had an actual real cake for my birthday. They do nothing for me. I started out many years ago making a Jack Daniels Pie (mix between a pecan pie and a chocolate chip pie) for my birthday. It was/is an amazing pie. Then one year, my wife made me this Peanut Butter Chip Pie. I have never looked back.

IMG_2120

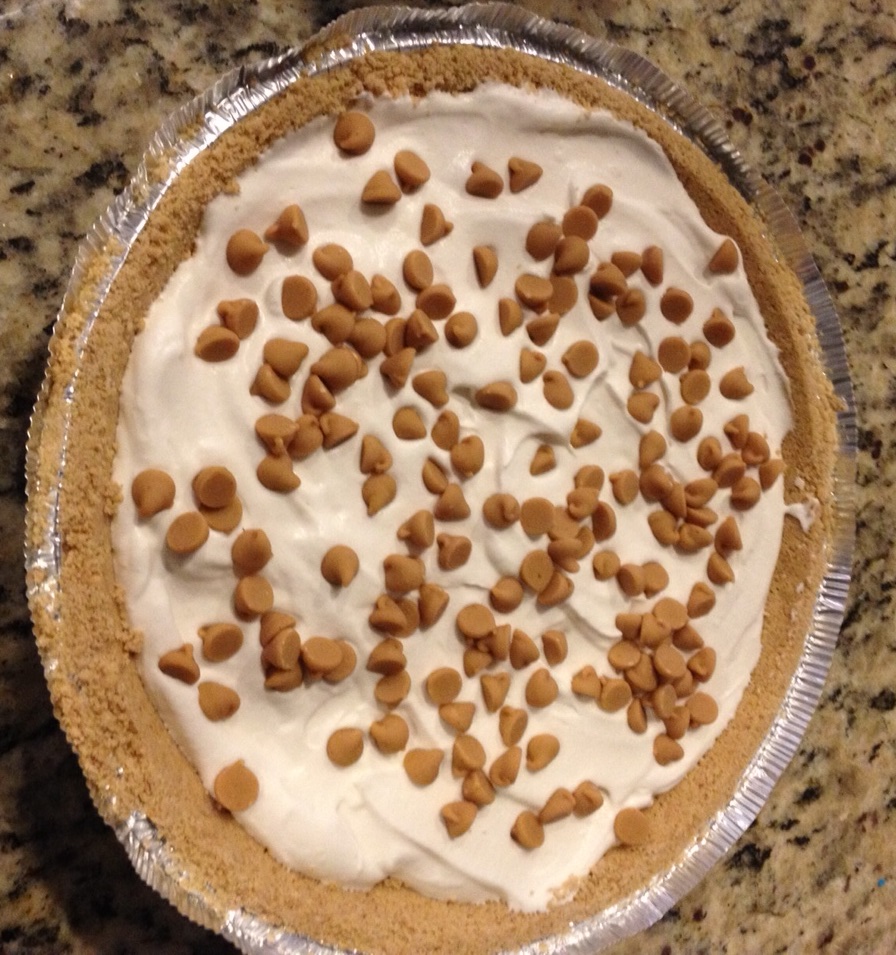
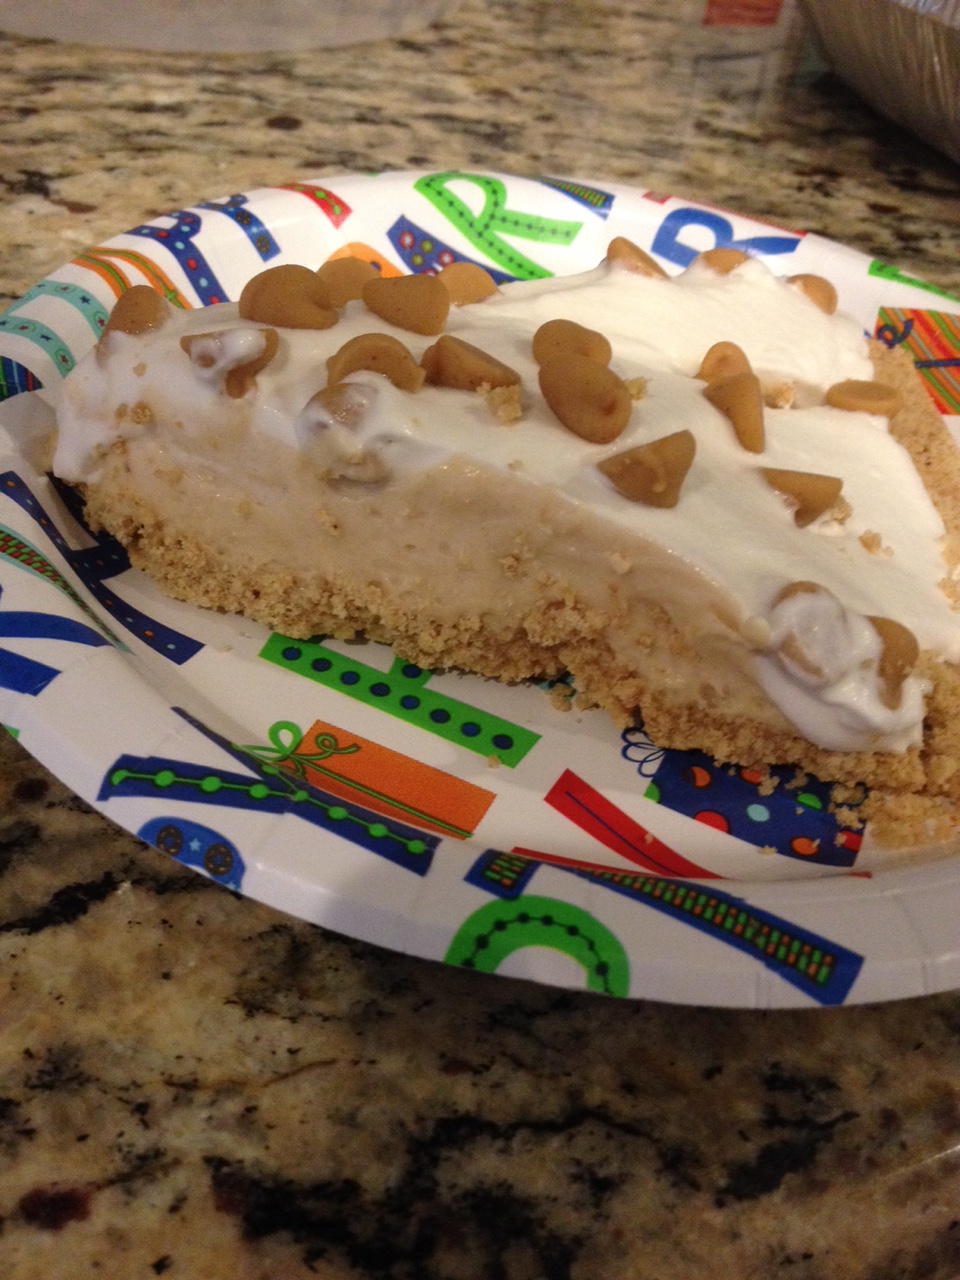
I have a thing for peanut butter chips. Like, I will just eat them out of the bag for a snack. I much prefer them to chocolate chips. Anyway, the pictures here are what the pie looks like when my wife is done making it. When a slice gets to my plate, I will have grabbed the leftover chips and completely covered the top of my piece to where you can barely see the whipped topping through the chips. I highly recommend this technique!!

IMG_2122 IMG_2124

Enjoy!

Easy Peanut Butter Chip Pie

Ingredients

3 oz cream cheese, softened

1 teaspoon lemon juice

1 2/3 cups (10-oz. pkg.) Reese’s Peanut Butter Chips, divided

2/3 cup sweetened condensed milk (not evaporated milk)

1 cup cold whipping cream, divided

1 packaged chocolate or graham cracker crumb crust (I recommend graham)

1 tablespoon powdered sugar

1 teaspoon vanilla extract

Directions

Beat the cream cheese and lemon juice in medium bowl on medium speed of mixer until fluffy, about 2 minutes. Set aside.

Place 1 cup peanut butter chips and sweetened condensed milk in medium microwave-safe bowl. Microwave for 45 seconds; stir. If necessary, microwave an additional 15 seconds at a time, stirring after each heating, until chips are melted and mixture is smooth when stirred.

Add warm peanut butter mixture to cream cheese mixture, Beat on medium speed until blended, about 1 minute. Beat ½ cup whipping cream in small bowl until stiff; fold into peanut butter mixture. Pour into crust. Cover, refrigerate about 6 hours or until firm.

Just before serving, combine remaining ½ cup whipping cream, powdered sugar and vanilla in small bowl. Beat until stiff; spread over filling. Garnish with remaining peanut butter chips. Cover and refrigerate leftover pie.

Recipe courtesy of the Hershey’s Holiday Collection cook book, 2002.

Come find me on Facebook here and Pinterest here.

Boneless Grilled Pork Chops

Sometimes I may sound like a broken record, stating how much I love America’s Test Kitchen, but I really do! And as you may have noticed, many of my recipes on here are courtesy of them. The one I am bringing you today, is so absolutely delicious and easy, that I do not think I will fix regular pork chops any other way again. This technique turns out perfectly juicy chops, which at least for me is always a challenge not drying them out. To boot, it only takes a few ingredients. The anchovy paste threw me for a few minutes, as I have never actually used it, but I gave in and bought a tube. When I tasted the chops, I never would have guessed that ingredient was used if I hadn’t put it on there myself.

IMG_2498

I served these with a rice pilaf, and they paired together wonderfully. The leftover chops also heated up perfectly the next day for lunch.

Boneless Grilled Pork Chops
Serves 4 to 6
Ingredients

6 (6- to 8-ounce) boneless pork chops, 3/4 to 1 inch thick
3 tablespoons salt
1 tablespoon vegetable oil
1 1/2 teaspoons honey
1 teaspoon anchovy paste (or very well-mashed rinsed and dried anchovy fillets)
1/2 teaspoon pepper

Directions

Cut 2 slits about 1 inch apart through outer layer of fat and connective tissue on each chop to prevent buckling. Dissolve salt in 1 1/2 quarts cold water in large container. Submerge chops in brine and let stand at room temperature for 30 minutes.

Whisk together oil, honey, anchovy paste, and pepper to form smooth paste. Remove pork from brine and pat dry with paper towels. Using spoon spread half of oil mixture evenly over 1 side of each chop (about 1/4 teaspoon per side).

FOR A CHARCOAL GRILL: Open bottom vent completely. Light chimney starter filled with charcoal briquettes (6 quarts). When top coals are partially covered with ash, pour evenly over half of grill. Set cooking grate in place, cover, and open lid vent completely. Heat grill until hot, about 5 minutes.

FOR A GAS GRILL: Turn all burners to high, cover, and heat grill until hot, about 15 minutes. Leave primary burner on high and turn off other burner(s).

Clean and oil cooking grate. Place chops, oiled side down, over hot part of grill and cook, uncovered, until well browned on first side, 4 to 6 minutes. While chops are grilling, spread remaining oil mixture evenly over second side of chops. Flip chops and continue to cook until chops register 140 degrees, 4 to 6 minutes longer (if chops are well browned but register less than 140 degrees, move to cooler part of grill to finish cooking). Transfer chops to plate and let rest for 5 minutes.

Recipe from America’s Test Kitchen.

Find me here on Facebook, and here in Pinterest.

Best Steakhouse Burgers

For those who have always wanted to try making burgers from scratch (from steaks), but don’t have a meat grinder, this is the recipe and technique for you. Not to mention, these are absolutely, hands-down the best burgers I have ever made. We will never go back to buying pre-ground meat again to make burgers. With this technique, you know exactly when your meat was ground, and have absolute control over the fat content.

IMG_2406

This comes from the latest issue of Cooks Illustrated, their July/ August issue. There are a lot more explanations provided in the issue that I am not adding to the below, but I think I am hitting all the high points. A couple of items to note are:

1) I cannot find “Sirloin Steak Tips, or Flap Meat” by me, so I use Chuck Steaks (see pic below, not to be confused with Chuck Roast) for the meat. This steak choice came recommended from another great source for grilling, http://www.amazingribs.com.

Chuck steaks being trimmed

Chuck steaks being trimmed

2) For well done burgers, ATK recommends adding a Panade. This is 1 slice of white bread torn into pieces mixed with 2 tablespoons of milk. Let combine for 5 minutes, then mash it to a paste with a fork. Add to the meat right when adding S&P, right before forming the patties. I added the Panade the first couple of times as my wife likes her burgers well-done. The next couple of times I didn’t as we had people over with a gluten restriction. I couldn’t tell the difference with or without it. I am skipping that from now on.

3) The first time I made these, I again stuck to the recipe and added 4 tablespoons of butter. In our opinion, and personal taste, this is WAY too much butter. I highly recommend cutting it in half to 2 tablespoons. The 4 tbsp reminded me of the “Butter Burgers” they serve in Wisconsin, where when your burger comes off the grill, they throw a huge slab of butter on top then add the top bun. First, it is a heart attack waiting to happen, but the extreme butter flavor overpowers the meat.

4) For the food processor, I use a Kitchen Aid 7-cup processor, and it handles the semi-frozen meat with absolutely no problem. I think any decent processor will work for this recipe.

IMG_2338

Meat and butter cubed and going into the freezer

IMG_2403

After the food processor, just prior to forming patties

Best Steakhouse Burgers

Ingredients

1.5 pounds sirloin steak tips (or chuck steak), trimmed and cut into ½-inch chunks

4 tablespoons unsalted butter, cut into ¼-inch pieces (recommend just 2 tbsp)

Kosher salt and pepper

Vegetable oil for grill grate

OPTION – Panade – 1 slice of white bread and 2 tbsp milk

Directions

Freeze Meat: Place beef chunks and butter on large plate or rimmed baking sheet in single layer. Freeze until meat is very firm and starting to harden around edges, but still pliable, about 35 minutes.

Grind Meat: Place one-quarter of meat and one-quarter of butter pieces in food processor and pulse until finely ground into rice-grain-size pieces (about 1/32 inch), 15 to 20 pluses, stopping and redistributing meat around bowl as necessary to ensure beef is evenly ground. Transfer meat to baking sheet. Repeat grinding with remaining meat and butter in 3 batches. Spread mixture over sheet and inspect carefully, discarding any long strands of gristle or large chunks of hard meat, fat, or butter.

Form Patties: Sprinkle 1 teaspoon pepper and ¾ teaspoon salt over meat and gently toss with fork to combine (if adding a Panade, do it here when you toss the S&P in). Divide meat into 4 balls. Toss each between your hands until uniformly but lightly packed. Gently flatten into patties ¾ inch thick and about 4 ½ inches in diameter. Using your thumb, make 1-inch-wide by 1/4-inch-deep depression in center of each patty. Transfer patties to platter and freeze for 30-45 minutes.

Cook Patties: For a gas grill, turn all burners to high, cover, and heat grill until hot, about 15 minutes. Leave all burners on high. Clean and oil cooking grates. Season 1 side of patties liberally with salt and pepper. Using spatula, flip patties and season other side. Grill patties without moving them until browned and meat releases easily from grill, 4 to 7 minutes. Flip patties and continue to grill until browned on second side and meat registers 120 to 125 for medium-rare or 130 to 135 degrees for medium, 4 to 7 minutes longer.

Transfer burgers to plate and let rest for 5 minutes. Transfer burgers to buns and serve with toppings.

Come find me on Facebook here, and on Pinterest here.

Also, as this is the season for grilling, if you are experiencing any issues with your Weber Grill, or need to get a hold of hard to find parts, please go to http://www.qualitygrillparts.com/

Roasted Corn Salsa

Here is an easy and quick summertime recipe for you, roasted corn salsa. This salsa can go with a variety of meals, especially anything cook-out related. If you go the fresh corn route, recommended, you might have to stop at the store. If you go the canned corn route, you probably already have everything you need in your pantry and refrigerator.

When I did this the first time (pictured), I did not roast the corn long enough, but it still turned out wonderful. Since then, I get a little more browning on the corn, but always forget to take a picture. Can’t win them all, right!

IMG_2397

Roasted Corn Salsa (This can easily be doubled or more)

Ingredients:

8 ounces roasted corn (fresh shucked is best, but not a must)

1/2 tomato, diced

1/4 cup red onion, diced

Dash of cayenne

1 tbsp jalapeno, diced (more to taste)

1/4 cup cilantro, diced

1/2 tbsp lime juice

salt to taste

Directions:

If using a cast iron skillet, set skillet over medium heat. Once hot, add the corn and roast for 4-6 minutes. Don’t move the corn for 1-2 minutes, allowing it to start to brown. If using non-stick, add just a little bit of EVOO to the pan when turning it on.

Once the corn is browned to your liking, remove from the heat, and add to a bowl with the remainder of the ingredients. Stir well to incorporate. Chill, then serve.

Come find me on Facebook here.

Chicken Enchilada Ring

For anyone that likes Tex-Mex food, you must try this Chicken Enchilada Ring. This recipe is one of my wife’s that she has been making us for years, and it absolutely never gets old. One of the things that makes this so good, is that I have never seen another rendition quite like this. I trust there is somewhere out there, I just haven’t run across it.

IMG_2436

I do wish I would have done it better justice by taking a few more pictures, especially of the process, and better ones definitely of the end result. But these few pictures should get the point across on what it should look like, and how you need to lay out the crescent rolls to start.

IMG_2435

Definitely give this one a try for something different, and if you do, I really think you will enjoy it. When we make this, I normally make queso and drizzle it on top of our portions once it id plated, and my wife likes hers with salsa and sour cream on top.

IMG_2434

Chicken Enchilada Ring

Ingredients:

2 cups chopped cooked chicken

1 cup shredded cheddar cheese

1 4-oz can chopped green chilis, un-drained

1/2 cup mayonnaise

1 tbsp southwestern seasoning mix

2 plum tomatoes, chopped

Juice from 1/2 lime

2/3 cups crushed tortilla chips

2 packages crescent rolls

Directions:

Preheat oven to 375 degrees F. In a large bowl, mix together chopped chicken, cheese, chilis, mayo and seasoning mix. Add tomato, lime juice, and chips to the mixture.

Separate crescent roll pieces and arrange to look like a sun, with the flat bases towards the center, and the skinny points facing out. Spoon mixture onto the fatter base parts, all the way around the circle. Fold tips of the pieces back over the mixture, pressing down on the tip to secure it to the base.

Cover a baking sheet with aluminum foil, and lightly spray with non-stick spray. Bake 20-25 minutes, or until golden brown.

Come find me on Facebook here.

Repairing Grills and Escaping the Rat Race

Grilling Fanatic

Have you ever wanted to get off the hamster wheel and start doing something you love for a living?

Yeah..me too.

I am tired of dealing with corporate layoffs, two hour commutes and mind numbing meetings.

It’s time for a change. The thought of change makes me happy.

One of the things I love is fixing up old Weber grills.

I buy used and beat up Weber grills off of Craigslist. I replace the burner tubes, Flavorizer bars, grill grates and ignition systems.

The grills get sold as refurbished grills on Craigslist.

I lose between $25-$50 per project 🙂

The money isn’t the important part about these rehab projects. I just hate the idea of beautiful grills ending up in landfills.

The hardest thing about fixing up old Weber grills is finding the right replacement parts.

Parts for a Weber Genesis C made in 2001 do not fit a Weber…

View original post 242 more words

Orange Chicken (w/ GF option)

I have gone through no less than a handful of Orange Chicken recipes, all with decent results. Even posted one on here that I thought was definitely worth making from the Pioneer Woman, who has never steered me wrong. But alas, she has to move to the side on this one, and I have now deleted that version and am replacing it with this one. It is hands down the best one I have made, and much better than what I can get from a take-out Chinese restaurant.

From the base recipe (linked below), I only made two minor changes. One, as the La Choy Orange Ginger sauce already has red pepper flakes in it, I omitted the extra addition of them to the sauce, but that is purely a personal preference as my family tends to lean towards the less spicy dishes. I have made it with the extra red pepper flakes, and it is still excellent. Second, instead of the gluten free white rice flour, I use GF all-purpose flour (Trader Joe’s brand works awesome!). I have also made this with regular all-purpose flour and it is just as good. I serve this over simple Jasmine rice.

Enjoy!

IMG_2081

Orange Chicken

Ingredients

One pound of boneless skinless chicken breast, chopped into bite size pieces

½ cup cornstarch

½ cup all-purpose flour (or GF all-purpose flour)

2 eggs

Vegetable oil for deep frying

Orange Sauce-

1½ Cups of La Choy Orange Ginger sauce

1½ teaspoons of garlic powder

½ teaspoon sesame oil

1½ teaspoons San-J Teriyaki Sauce

Optional- sesame seeds and chopped green onions.

Instructions

Crack eggs in shallow dish or bowl and break yolks/lightly scramble. Mix together cornstarch and rice flour on a separate shallow dish.

Dip chicken pieces into egg let any excess drip off then dredge into the flour mixture and coat pieces of chicken. Heat oil for deep frying in wok or deep fryer to 375°F.

While oil is heating stir together orange sauce and garlic power in saucepan. Heat thoroughly then add sesame oil and stir together. Turn sauce to low.

Once oil is heated fry in batches about 3-4 minutes until a golden crisp and chicken is 165° internally.

Add chicken to orange sauce and stir together, coating the chicken in the sauce. Add chopped green onions and sesame seeds for garnish. Serve immediately.

The original recipe can be found at Rolling Out Dough here.

You can find me on Facebook here.

Jalapeno and Cheddar Corn Bread Muffins

Living in the South, it is pretty much mandatory to have a go-to corn bread recipe. Nothing against Jiffy Corn Muffin Mix, as I made that for a long time, and it really turns out just fine. But for barely any more work, you can try this one which is absolutely delicious, and has that made from scratch, pure goodness to it.

IMG_2050

I started with a recipe from The Comfort of Cooking. Really, the only change I made was instead of using regular jalapeno’s, minced, I started with jarred sliced jalapeno’s and minced them. As a personal preference, I did not want the chance of having crunchy jalapeno pieces in the muffins, and I wasn’t sure if the bake time would be enough to soften them. I trust the muffins are great either way. I doubled the below recipe to make 24 muffins, as I was making them for a crowd. It doubled perfectly, and were great served slightly warm. You could also use this recipe for a corn bread made in a 8×8 baking dish.

Enjoy!

IMG_2049

Jalapeno and Cheddar Corn Bread Muffins

Ingredients

1/2 cup unsalted butter, melted
2/3 cup granulated sugar
1 1/2 tablespoons honey
2 large eggs
1 cup buttermilk
1 cup yellow cornmeal
1 cup flour
1/2 teaspoon salt
1/2 teaspoon baking soda
2 tablespoons jarred jalapeno slices, minced (more to taste)
1/2 cup shredded cheddar cheese

Directions

Preheat your oven to 350 degrees F.

In a medium bowl, stir butter, sugar and honey together. Whisk in eggs and buttermilk. Add cornmeal, flour, salt and baking soda. Do not over-mix. Fold in jalapeno and cheese.

Divide batter equally between the cups of a greased muffin tin. Bake for 20 minutes. Test the center of one muffin with a toothpick and make sure it comes out clean. If not clean, bake for about 5 more minutes.

Come find me on Facebook here.

Baked Beans, Southern Style

Truth be told, baked beans out of a can, such as Bush’s Baked Beans are really quite good. One of my favorite meals is a couple of hot dogs, cut up and heated in a skillet, and then a can of Bush’s baked beans thrown on top and mixed together. Comfort food at it’s finest.

But of course, there is always the element of personal satisfaction of making something from scratch, that rivals or beats your perceived gold standard. These beans are one of those dishes. Incredibly easy to make, and pretty much fool-proof. It takes some time, but after the initial couple of stages, all the time is the beans sitting, simmering in the oven. If you are on a gluten free diet, these beans are perfect for you.

This recipe is from Ree Drummond, aka The Pioneer Woman. As with most of her recipes, it feeds a small circus troupe. If I am making this for just my family, I half the recipe and make it in a 8×8″ glass dish. If having company over, I leave it as is and use a 9×13″. Give it a try, you will not be disappointed!

IMG_2032

Southern Style Baked Beans

Serves up to 18

8 slices bacon, halved

1 medium onion, cut into small dice

1/2 medium green pepper, cut into small dice

3 large cans (28 ounces each) pork and beans

3/4 cup barbecue sauce

1/2 cup brown sugar

1/4 cup distilled or cider vinegar

2 teaspoons dry mustard or 2 tablespoons Dijon

Adjust oven rack to lower-middle position and heat oven to 325 degrees. Fry bacon in large, deep sauté pan skillet until bacon has partially cooked and released about 1/4 cup drippings. Remove bacon from pan and drain on paper towels. Add onions and peppers to drippings in pan and sauté until tender, about 5 minutes.

Add beans and remaining ingredients bring to a simmer. (If skillet is not large enough, add beans and heat to a simmer then transfer to a large bowl and stir in remaining ingredients). Pour flavored beans into a greased 13-by 9-inch (or similar size) ovenproof pan. Top with bacon, then bake until beans are bubbly and sauce is the consistency of pancake syrup, about 2 hours. Let stand to thicken slightly and serve.

Come find me on Facebook here.

Jalapeno and Green Apple Fried Rice

Have you ever been stuck in a rut when it comes to cooking, seldom branching out from what you know and like best? A few weeks before Easter I started planning our Easter dinner, and couldn’t get the old staples out of my head. Those staples are great for a number of reasons, but I wanted at least one new dish to be new.

Along comes a friend who recommends Jalapeno and Green Apple Fried Rice. First, I did a double take sure that I heard wrong. But lo and behold, I had not. Not having the confidence of a seasoned cook yet, there was no way I was serving that for Easter without trying it first. With two weeks to spare, I had plenty of time. Halfway there, I convinced my wife we needed to try it, no matter how out in left field it sounded. We did, and I baked a couple of simple chicken breasts to go along with it. For me, I turned it into a sort of rice bowl with the chicken cut-up on top, see below.

FullSizeRender

It was REALLY, REALLY good. And as odd as the combination sounded, it really came together so nicely, balancing itself out perfectly. So, it was made again for Easter and all our guests really enjoyed it, albeit everyone had to ask what it was when they peered into the bowl. Ha! Give it a try, you won’t be disappointed. One of our eaters is on a gluten free diet, which this dish is perfect for.

This is the Easter version. I was running around like a madman trying to bring everything together, that I am surprised I even got a picture of it at all. Sorry it’s not pretty!

IMG_2031

Jalapeno and Green Apple Fried Rice

1 Granny Smith Apple, cored and thinly sliced

1 ½ – 2 Jalapeno pepper, veins and seeds removed, and diced

½ small red onion, diced

3/4 teaspoon fennel or anise

2 TBSP EVOO

1 glove, garlic

1 cup Jasmine Rice

2 cups hot water (more if needed)

Salt and Pepper

Directions:

Core granny smith apple, leaving skin on, and slice them;  Saute apples, pepper, onion all in evoo and add anise or fennel seed. Add jasmine rice and continue to saute on med low heat till rice is lightly toasted. Add hot water, bring to a boil for 10 minutes, reduce heat to low, tightly cover with seran wrap and lid and continue to cook on low for another 30-45 minutes. You may to add some water over rice at the end, depending on how tender and sticky you want the rice.  Salt and pepper to taste.