Boneless Grilled Pork Chops

Sometimes I may sound like a broken record, stating how much I love America’s Test Kitchen, but I really do! And as you may have noticed, many of my recipes on here are courtesy of them. The one I am bringing you today, is so absolutely delicious and easy, that I do not think I will fix regular pork chops any other way again. This technique turns out perfectly juicy chops, which at least for me is always a challenge not drying them out. To boot, it only takes a few ingredients. The anchovy paste threw me for a few minutes, as I have never actually used it, but I gave in and bought a tube. When I tasted the chops, I never would have guessed that ingredient was used if I hadn’t put it on there myself.

IMG_2498

I served these with a rice pilaf, and they paired together wonderfully. The leftover chops also heated up perfectly the next day for lunch.

Boneless Grilled Pork Chops
Serves 4 to 6
Ingredients

6 (6- to 8-ounce) boneless pork chops, 3/4 to 1 inch thick
3 tablespoons salt
1 tablespoon vegetable oil
1 1/2 teaspoons honey
1 teaspoon anchovy paste (or very well-mashed rinsed and dried anchovy fillets)
1/2 teaspoon pepper

Directions

Cut 2 slits about 1 inch apart through outer layer of fat and connective tissue on each chop to prevent buckling. Dissolve salt in 1 1/2 quarts cold water in large container. Submerge chops in brine and let stand at room temperature for 30 minutes.

Whisk together oil, honey, anchovy paste, and pepper to form smooth paste. Remove pork from brine and pat dry with paper towels. Using spoon spread half of oil mixture evenly over 1 side of each chop (about 1/4 teaspoon per side).

FOR A CHARCOAL GRILL: Open bottom vent completely. Light chimney starter filled with charcoal briquettes (6 quarts). When top coals are partially covered with ash, pour evenly over half of grill. Set cooking grate in place, cover, and open lid vent completely. Heat grill until hot, about 5 minutes.

FOR A GAS GRILL: Turn all burners to high, cover, and heat grill until hot, about 15 minutes. Leave primary burner on high and turn off other burner(s).

Clean and oil cooking grate. Place chops, oiled side down, over hot part of grill and cook, uncovered, until well browned on first side, 4 to 6 minutes. While chops are grilling, spread remaining oil mixture evenly over second side of chops. Flip chops and continue to cook until chops register 140 degrees, 4 to 6 minutes longer (if chops are well browned but register less than 140 degrees, move to cooler part of grill to finish cooking). Transfer chops to plate and let rest for 5 minutes.

Recipe from America’s Test Kitchen.

Find me here on Facebook, and here in Pinterest.

GF Breaded Pork Tenderloin Cutlets

Two things are amazing with this recipe. First, you will never have believed that you could make pork tenderloin cutlets as tender as these turn out. Second, you will swear there is no way they are gluten free. We have made these numerous times now, and they always turn out fantastic. I am not trying to figure out what other dishes I can make using this cooking technique. Next up, I believe I am going to do chicken cutlets. If you have a small family like mine, one pork tenderloin will provide for two iterations of this recipe. When I get it home from the store, I cut the tenderloin in two, then freeze half to make on another occasion.

If you do not have a Trader Joe’s close by and your grocery store doesn’t carry GF all-purpose flour, there are recipes online for how to make your own. I believe they are usually a mixture to include Rice Flour, tapioca flour, etc. On the GF breadcrumbs, I use Rice Chex cereal pulsed until fine in a food processor. I have used this alternative on these cutlets, chicken parmesan, and many other breaded dishes and I cannot tell the difference between this, and panko or other breadcrumbs.

Enjoy!

IMG_2009

Normally I serve these cutlets with mashed potatoes. Woops, must have forgotten the vegetable by accident! 🙂

The improvised raised bed in the Dutch Oven.

The improvised raised bed in the Dutch Oven, with water in the bottom.

After browned in oil, pre-baking.

After browned in oil, pre-baking.

Baking complete, ready to eat!

Baking complete, ready to eat!

IMG_2006

GF Breaded Pork Tenderloin Cutlets

Ingredients

2-3lb pork tenderloin

1/2 cup GF all-purpose flour (I use Trader Joe’s)

1 tsp kosher salt

1 tsp ground black pepper

1/2 tsp smoked paprika

1 cup GF Breadcrumbs (I use Rice Chex cereal pulsed in a food processor)

3 large eggs plus 3 tsp water

1/3 cup avocado or canola oil, divided into Tbl increments

Instructions

Preheat oven to 350F with the rack in the middle. Cut the tenderloin crosswise into 2″ rounds. Places each piece between two sheets of plastic wrap and gently pound until they are thin cutlets (less than 1/4” thick).

Set up your station with 3 separate pie pans. In the first pie pan place the flour, salt, pepper and paprika and gently mix. In the middle pie pan add the eggs and water whisking to combine. In the last pie pan place the bread crumbs.

In a medium non-stick skillet over medium heat add 2 Tbl of oil. Once the oil starts to shimmer, dredge a cutlet in flour coating all sides. Next dip it in the egg flipping to get all sides wet. Gently lift up letting the excess egg drip off. Place the cutlet in the breadcrumbs and coat all sides. At this point you can coat a few and cook all at once being sure you do not crowd the pan.

Gently place the cutlets in the hot oil cooking each side about 3-4 minutes or until each side is golden brown. Continue coating and cooking in batches until they are all pan-seared. You will need to add more oil as you cook.

Either in a large roasting pan (that has a lid) with a rack in the bottom or a large dutch oven that has a lid (if you can fit a rack in it great, if not it’s OK) take about 2-4’ of aluminum foil and crumble it up like a snake. You want to rest this on top of the rack or the bottom of the dutch oven. The goal here is to have the food be elevated at least 1” above the bottom of the pan.

Place about 1/2-1 cup of water at the bottom of the pan. The foil or rack can sit it but the water cannot go over top of the foil or touch the cutlets. Take the pan-seared cutlets and place them on top of the foil. It’s okay to stack them if you made a lot. You just don’t want them to touch the water.

Cover the roaster or pan very tightly with foil and the lid. You want to steam these now. This is the trick to get them ridiculously tender. Bake for 40 minutes. Remove from the oven and gently remove.

Recipe slightly adapted from The Kitchen Whisperer.

Come follow me on Facebook here.

Italian Sausage Bake

Like many others, I am always in search for easy and delicious one pot meals. Unfortunately I have found they are few and far between. This is a great one for a weekend, or if you have an opportunity during the week to assemble and bake a couple of hours before dinner. Sausage and potatoes gives you your main course and side dish with some great flavoring from the peppers and onions. We generally will make a side salad to go with this as well. If you have someone in your house on a gluten free diet, this dish is perfect for you!

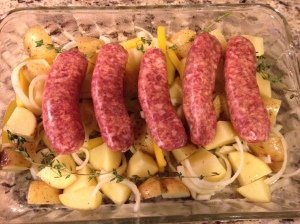
IMG_1910

Fixing to cover and head into the oven.

A couple of notes for you. Do not cut up the potatoes too small or they won’t hold up well after two hours. I try to stay between 1.5 – 2 inch pieces. Also, the first couple of times I made this I added the tomatoes at the beginning, as the source recipe called for. They definitely don’t hold up for that long. They still had flavor, but they were too mushy for my taste. So I add them at the 90 minute mark when I remove the foil. They hold up much better that way. We also use sweet Italian Sausage instead of spicy as that is just our preference. And if we ever have leftovers with this one, which is rare, I turn it into a sausage and potato hash with eggs for lunch the next day. Yum!!!

Enjoy!

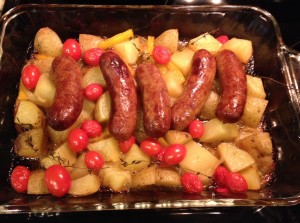
IMG_1914

Ready to eat!!

Italian Sausage Bake

Ingredients

1 pint grape tomatoes, red and/or yellow variety

1 pound honey gold potatoes, cut in to 2″ pieces

2 large bell peppers, chopped length-wise 1-inch

1 large red onion, sliced

1 tablespoon olive oil

3 cloves garlic, roughly chopped

6 links Italian sausage, sweet or spicy

5 sprigs dried thyme

salt and pepper to taste

Directions

Preheat oven to 400°F. In a large baking dish, toss potatoes, bell peppers, and red onion with one tablespoon olive oil and chopped garlic. Mix well until incorporated and salt and pepper to taste.

Place the sausage links on top of the vegetables. Place sprigs of thyme throughout the dish. Cover with foil and bake for 90 minutes.

Remove foil from baking dish, add the tomatoes, mix vegetables around, and bake for an additional 30 minutes (flipping sausages halfway) until the sausage is golden brown.

Come find me on Facebook here.

Recipe slightly adapted from Katie’s Cucina.

Slow Cooker Pulled Pork

In life, I believe we all have a personal nemesis, or maybe a handful (x 10 in my case) of them. This may sound ridiculous (probably because it is), but one of mine has been to make a good pulled pork dish. I have tried slow cooker recipes, braising recipes, etc. And no matter what I try, no matter how much liquid the pork is buried in, how much bbq sauce is poured over it on a sandwich, the meat is always dry. I cannot figure it out.

Well today, I have one less nemesis to worry about! I have conquered the pulled pork sandwich!

The last few weeks, I had been studying different recipes for the dish, reading about different techniques, etc. On a whim, I decided to take what I thought might be the finer points of a few different recipes, and blended them together into a new one. The result, was better than expected, and will now be a featured dinner in our rotation. My wife even suggested we make it again in just two days when some of her family will be over for dinner, that’s how much she liked it. She NEVER eats the same meal twice within a week or two. Me personally, I can eat my favorite dishes (such as my spaghetti and meatballs, chicken enchiladas, etc) 7 nights in the same week and not tire of them.

If you like pulled pork, or is you never had it, give this a try. We didn’t even feel the need for a side dish once we tasted it at the shredding stage, which is 30 minutes prior to eating it. My wife did throw some pickles on her plate which was a great accompaniment, and also another hurdle overcome this week. More on that in my next post.

And by the way, I did horrible taking pictures on this one. There are only a few for you.

IMG_1551

The pork just into the slow cooker with the marinade poured in.

IMG_1553 IMG_1555

I went the two sandwich route sans a side. The wife went with the B&B pickles.

Slow Cooker Pulled Pork

Ingredients

1 cup water
1 cup barbeque sauce
¾ cup ketchup
¼ cup honey
¼ cup Worcestershire sauce
¼ cup brown sugar
4 cloves garlic, minced
1 tablespoon dried minced onions
1 teaspoon chili powder (or more if you want a bit of a kick)
Salt and pepper
1, 3-4 pound pork shoulder roast

Directions

Mix the first nine ingredients in a bowl, until well incorporated. Place pork roast in the slow cooker, and add the marinade. Cook on low for 6-7 hours. 30 minutes prior to serving, pull roast out of cooker and shred the meat with two forks. Add meat back into the cooker and mix well with the sauce. Cook for the final 30 minutes. Serve on hamburger buns.
 
Note: On the barbeque sauce, I would go with a non-sweet style. Such as, don’t use Sweet Baby Ray’s as much as I love it. There are enough sweet ingredients in this recipe, you don’t want to overdo it. For this dish, I used the basic Kraft brand barbeque sauce. With so much going on in the recipe, you don’t need an expensive or fancy bbq sauce to make this dish awesome.