Happy Birthday AiC, and an Easy Peanut Butter Chip Pie

A year ago today, I published my first post on Antics in Cooking, Spicy Sausage Pasta. Little did I think then I would still be doing this a year later. I started it as a way to chronicle many of the new dishes I was trying as I was really diving into cooking every meal, attempting to alleviate some of that stress from my wife. I was finding many of the recipes I was trying through similar blogs, which have been an immense help for me. 

I stand by the original description, still on the home page today, “…sharing terrible photos and awesome recipes, and having fun doing it.” I really have enjoyed it, and I still take really horrible pictures!

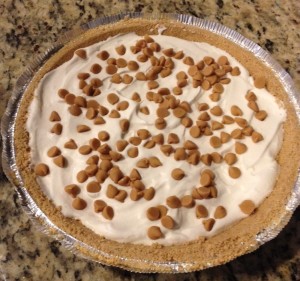
For the first birthday of the site, I thought I would share what I eat for my “birthday cake” for as long as I care to remember. I actually can’t remember when I had an actual real cake for my birthday. They do nothing for me. I started out many years ago making a Jack Daniels Pie (mix between a pecan pie and a chocolate chip pie) for my birthday. It was/is an amazing pie. Then one year, my wife made me this Peanut Butter Chip Pie. I have never looked back.

IMG_2120

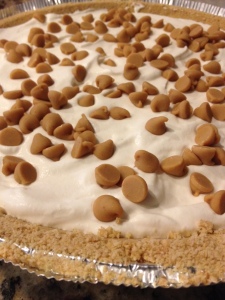
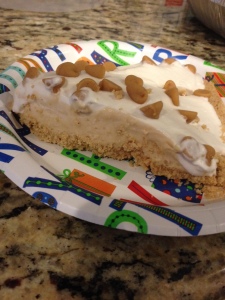
I have a thing for peanut butter chips. Like, I will just eat them out of the bag for a snack. I much prefer them to chocolate chips. Anyway, the pictures here are what the pie looks like when my wife is done making it. When a slice gets to my plate, I will have grabbed the leftover chips and completely covered the top of my piece to where you can barely see the whipped topping through the chips. I highly recommend this technique!!

IMG_2122 IMG_2124

Enjoy!

Easy Peanut Butter Chip Pie

Ingredients

3 oz cream cheese, softened

1 teaspoon lemon juice

1 2/3 cups (10-oz. pkg.) Reese’s Peanut Butter Chips, divided

2/3 cup sweetened condensed milk (not evaporated milk)

1 cup cold whipping cream, divided

1 packaged chocolate or graham cracker crumb crust (I recommend graham)

1 tablespoon powdered sugar

1 teaspoon vanilla extract

Directions

Beat the cream cheese and lemon juice in medium bowl on medium speed of mixer until fluffy, about 2 minutes. Set aside.

Place 1 cup peanut butter chips and sweetened condensed milk in medium microwave-safe bowl. Microwave for 45 seconds; stir. If necessary, microwave an additional 15 seconds at a time, stirring after each heating, until chips are melted and mixture is smooth when stirred.

Add warm peanut butter mixture to cream cheese mixture, Beat on medium speed until blended, about 1 minute. Beat ½ cup whipping cream in small bowl until stiff; fold into peanut butter mixture. Pour into crust. Cover, refrigerate about 6 hours or until firm.

Just before serving, combine remaining ½ cup whipping cream, powdered sugar and vanilla in small bowl. Beat until stiff; spread over filling. Garnish with remaining peanut butter chips. Cover and refrigerate leftover pie.

Recipe courtesy of the Hershey’s Holiday Collection cook book, 2002.

Come find me on Facebook here and Pinterest here.

Boneless Grilled Pork Chops

Sometimes I may sound like a broken record, stating how much I love America’s Test Kitchen, but I really do! And as you may have noticed, many of my recipes on here are courtesy of them. The one I am bringing you today, is so absolutely delicious and easy, that I do not think I will fix regular pork chops any other way again. This technique turns out perfectly juicy chops, which at least for me is always a challenge not drying them out. To boot, it only takes a few ingredients. The anchovy paste threw me for a few minutes, as I have never actually used it, but I gave in and bought a tube. When I tasted the chops, I never would have guessed that ingredient was used if I hadn’t put it on there myself.

IMG_2498

I served these with a rice pilaf, and they paired together wonderfully. The leftover chops also heated up perfectly the next day for lunch.

Boneless Grilled Pork Chops
Serves 4 to 6
Ingredients

6 (6- to 8-ounce) boneless pork chops, 3/4 to 1 inch thick
3 tablespoons salt
1 tablespoon vegetable oil
1 1/2 teaspoons honey
1 teaspoon anchovy paste (or very well-mashed rinsed and dried anchovy fillets)
1/2 teaspoon pepper

Directions

Cut 2 slits about 1 inch apart through outer layer of fat and connective tissue on each chop to prevent buckling. Dissolve salt in 1 1/2 quarts cold water in large container. Submerge chops in brine and let stand at room temperature for 30 minutes.

Whisk together oil, honey, anchovy paste, and pepper to form smooth paste. Remove pork from brine and pat dry with paper towels. Using spoon spread half of oil mixture evenly over 1 side of each chop (about 1/4 teaspoon per side).

FOR A CHARCOAL GRILL: Open bottom vent completely. Light chimney starter filled with charcoal briquettes (6 quarts). When top coals are partially covered with ash, pour evenly over half of grill. Set cooking grate in place, cover, and open lid vent completely. Heat grill until hot, about 5 minutes.

FOR A GAS GRILL: Turn all burners to high, cover, and heat grill until hot, about 15 minutes. Leave primary burner on high and turn off other burner(s).

Clean and oil cooking grate. Place chops, oiled side down, over hot part of grill and cook, uncovered, until well browned on first side, 4 to 6 minutes. While chops are grilling, spread remaining oil mixture evenly over second side of chops. Flip chops and continue to cook until chops register 140 degrees, 4 to 6 minutes longer (if chops are well browned but register less than 140 degrees, move to cooler part of grill to finish cooking). Transfer chops to plate and let rest for 5 minutes.

Recipe from America’s Test Kitchen.

Find me here on Facebook, and here in Pinterest.

Best Steakhouse Burgers

For those who have always wanted to try making burgers from scratch (from steaks), but don’t have a meat grinder, this is the recipe and technique for you. Not to mention, these are absolutely, hands-down the best burgers I have ever made. We will never go back to buying pre-ground meat again to make burgers. With this technique, you know exactly when your meat was ground, and have absolute control over the fat content.

IMG_2406

This comes from the latest issue of Cooks Illustrated, their July/ August issue. There are a lot more explanations provided in the issue that I am not adding to the below, but I think I am hitting all the high points. A couple of items to note are:

1) I cannot find “Sirloin Steak Tips, or Flap Meat” by me, so I use Chuck Steaks (see pic below, not to be confused with Chuck Roast) for the meat. This steak choice came recommended from another great source for grilling, http://www.amazingribs.com.

Chuck steaks being trimmed

Chuck steaks being trimmed

2) For well done burgers, ATK recommends adding a Panade. This is 1 slice of white bread torn into pieces mixed with 2 tablespoons of milk. Let combine for 5 minutes, then mash it to a paste with a fork. Add to the meat right when adding S&P, right before forming the patties. I added the Panade the first couple of times as my wife likes her burgers well-done. The next couple of times I didn’t as we had people over with a gluten restriction. I couldn’t tell the difference with or without it. I am skipping that from now on.

3) The first time I made these, I again stuck to the recipe and added 4 tablespoons of butter. In our opinion, and personal taste, this is WAY too much butter. I highly recommend cutting it in half to 2 tablespoons. The 4 tbsp reminded me of the “Butter Burgers” they serve in Wisconsin, where when your burger comes off the grill, they throw a huge slab of butter on top then add the top bun. First, it is a heart attack waiting to happen, but the extreme butter flavor overpowers the meat.

4) For the food processor, I use a Kitchen Aid 7-cup processor, and it handles the semi-frozen meat with absolutely no problem. I think any decent processor will work for this recipe.

IMG_2338

Meat and butter cubed and going into the freezer

IMG_2403

After the food processor, just prior to forming patties

Best Steakhouse Burgers

Ingredients

1.5 pounds sirloin steak tips (or chuck steak), trimmed and cut into ½-inch chunks

4 tablespoons unsalted butter, cut into ¼-inch pieces (recommend just 2 tbsp)

Kosher salt and pepper

Vegetable oil for grill grate

OPTION – Panade – 1 slice of white bread and 2 tbsp milk

Directions

Freeze Meat: Place beef chunks and butter on large plate or rimmed baking sheet in single layer. Freeze until meat is very firm and starting to harden around edges, but still pliable, about 35 minutes.

Grind Meat: Place one-quarter of meat and one-quarter of butter pieces in food processor and pulse until finely ground into rice-grain-size pieces (about 1/32 inch), 15 to 20 pluses, stopping and redistributing meat around bowl as necessary to ensure beef is evenly ground. Transfer meat to baking sheet. Repeat grinding with remaining meat and butter in 3 batches. Spread mixture over sheet and inspect carefully, discarding any long strands of gristle or large chunks of hard meat, fat, or butter.

Form Patties: Sprinkle 1 teaspoon pepper and ¾ teaspoon salt over meat and gently toss with fork to combine (if adding a Panade, do it here when you toss the S&P in). Divide meat into 4 balls. Toss each between your hands until uniformly but lightly packed. Gently flatten into patties ¾ inch thick and about 4 ½ inches in diameter. Using your thumb, make 1-inch-wide by 1/4-inch-deep depression in center of each patty. Transfer patties to platter and freeze for 30-45 minutes.

Cook Patties: For a gas grill, turn all burners to high, cover, and heat grill until hot, about 15 minutes. Leave all burners on high. Clean and oil cooking grates. Season 1 side of patties liberally with salt and pepper. Using spatula, flip patties and season other side. Grill patties without moving them until browned and meat releases easily from grill, 4 to 7 minutes. Flip patties and continue to grill until browned on second side and meat registers 120 to 125 for medium-rare or 130 to 135 degrees for medium, 4 to 7 minutes longer.

Transfer burgers to plate and let rest for 5 minutes. Transfer burgers to buns and serve with toppings.

Come find me on Facebook here, and on Pinterest here.

Also, as this is the season for grilling, if you are experiencing any issues with your Weber Grill, or need to get a hold of hard to find parts, please go to http://www.qualitygrillparts.com/

Roasted Corn Salsa

Here is an easy and quick summertime recipe for you, roasted corn salsa. This salsa can go with a variety of meals, especially anything cook-out related. If you go the fresh corn route, recommended, you might have to stop at the store. If you go the canned corn route, you probably already have everything you need in your pantry and refrigerator.

When I did this the first time (pictured), I did not roast the corn long enough, but it still turned out wonderful. Since then, I get a little more browning on the corn, but always forget to take a picture. Can’t win them all, right!

IMG_2397

Roasted Corn Salsa (This can easily be doubled or more)

Ingredients:

8 ounces roasted corn (fresh shucked is best, but not a must)

1/2 tomato, diced

1/4 cup red onion, diced

Dash of cayenne

1 tbsp jalapeno, diced (more to taste)

1/4 cup cilantro, diced

1/2 tbsp lime juice

salt to taste

Directions:

If using a cast iron skillet, set skillet over medium heat. Once hot, add the corn and roast for 4-6 minutes. Don’t move the corn for 1-2 minutes, allowing it to start to brown. If using non-stick, add just a little bit of EVOO to the pan when turning it on.

Once the corn is browned to your liking, remove from the heat, and add to a bowl with the remainder of the ingredients. Stir well to incorporate. Chill, then serve.

Come find me on Facebook here.

Chicken Chilaquiles

Chicken Chilaquiles! Don’t ask me how to pronounce it, as I have not the faintest idea! For someone who never had even a bite of Mexican food growing up, I sure have not come to love it! Love it in as it is on the menu at least 2-3 times a week, in some form or fashion. The latest attempt was not only the first time making this dish, it was a first time eating this dish. I had come to notice it more and more on Tex-Mex restaurant menu’s, and while I never ordered it, it definitely intrigued me. And I honestly, the only reason I didn’t order it was it looked so simple, I couldn’t justify spending money to have someone else make it for me.

At the end of the day, it was as easy as it looked, and just as tasty. If you have someone on a gluten free diet in your house, this dish is perfect for you. Many restaurants serve this as a brunch item, but I really cant picture this, especially paired with eggs. We enjoy this at dinner. My wife tops her plate of chilaquiles with sour cream and cut-up avocado.  Enjoy!

IMG_1972

Chicken Chilaquiles

Ingredients

1 28oz can whole tomatoes

1 jalapeno pepper, chopped

2 tablespoons chilies in adobo, chopped

1 cup chicken broth

1 teaspoon salt

1 tablespoon oil

1 small onion, finely chopped

2 cloves, garlic, chopped

2 chicken breasts, cooked and shredded

1/2 bag of tortilla chips

1 ½ cups cheddar cheese, shredded (option: switch half of cheddar with Monterey Jack)

Directions

Preheat oven to 350 degrees. In a large food processor or blender, add in tomatoes, jalapenos, chilies, broth, and salt. Pulse until it is smooth. Set-aside.

Heat oil in a large skillet. Cook onions until soft and translucent. Add garlic, and cook for 30 seconds. Add the tomato mixture and bring to a boil. Reduce heat, and simmer for 8-10 minutes. Add cooked chicken pieces and stir in evenly.

Using a 9×13” casserole dish, layer tortilla chips in the bottom until they are even, and fill up approximately half of the dish. Pour sauce evenly over the top. Sprinkle cheese over the sauce. Bake until the cheese is melted, approximately 5-8 minutes.

Come find me on Facebook here.

Stuffed Bell Peppers

This dish, requested by my wife recently was a first for me. I have never been a bell pepper fan, unless they are sauteed almost beyond oblivion. That being said, I have not tried bell peppers made otherwise for probably the last 20 years. As once I “know” I don’t like something and it is stuck in my head, it is pretty hard to convince me otherwise.

So last week when my wife requested it, I had no clue. Instead of perusing the internet, I turned first to one of my sisters. Thankfully enough, she had a tried and true recipe. Truth be told however, this “recipe” was her scribbling down notes while her husbands grandmother made these for them years ago. This is same way she got her meatballs recipe, which I have shared with you (Your New Favorite Meatballs), and are pretty darn good.

So this recipe is slightly adapted, from a slightly adapted recipe from an Italian Grandmother. Can’t beat it!

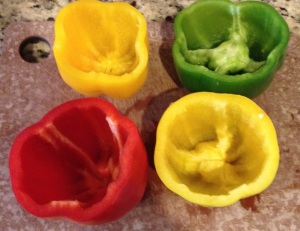
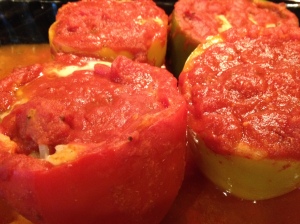
IMG_1949

Started out with a colorful assortment.

IMG_1953

Just out of the oven.

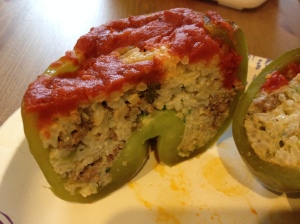
Ready to eat!!

Ready to eat!!

Stuffed Bell Peppers

Ingredients
6 peppers, plus 1 pepper diced
2 tablespoons oil, divided
1 onion
2 cloves garlic, minced
Pinch red pepper flakes
½ lb ground beef
2 cups cooked white rice
3 eggs, lightly beaten
½ cup grated parmesan
¼ cup grated mozzarella
¼ cup parsley, chopped
Salt and pepper
Flour (Gluten Free APF if desired)
1 cup marinara sauce

Instructions

Sauté onion, diced pepper, garlic and red pepper flakes in oil. Once softened, add ground beef and cook until browned through. Remove from heat and mix the meat mixture with the rice. Add eggs, cheese, parsley, salt and pepper.
Preheat the oven to 350 degrees. Cut the top off the 6 peppers, and remove the insides. Sprinkle the insides with flour, then fill with the meat/rice/cheese mixture.
Flour the tops, and fry in oil for 5 minutes or so (see note).  Add to a pan, pouring sauce over the tops of the peppers. Add a cup of water or so to the bottom of the pan. Cover with foil, and bake for 1 hour or until tender.
*Note: After flouring the tops, flip upside down to brown in the oil. The mixture inside is fairly wet at this point, so the mixture should not fall out if is packed in pretty well.

Come follow me on Facebook here.

Italian Sausage Bake

Like many others, I am always in search for easy and delicious one pot meals. Unfortunately I have found they are few and far between. This is a great one for a weekend, or if you have an opportunity during the week to assemble and bake a couple of hours before dinner. Sausage and potatoes gives you your main course and side dish with some great flavoring from the peppers and onions. We generally will make a side salad to go with this as well. If you have someone in your house on a gluten free diet, this dish is perfect for you!

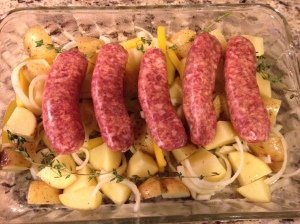
IMG_1910

Fixing to cover and head into the oven.

A couple of notes for you. Do not cut up the potatoes too small or they won’t hold up well after two hours. I try to stay between 1.5 – 2 inch pieces. Also, the first couple of times I made this I added the tomatoes at the beginning, as the source recipe called for. They definitely don’t hold up for that long. They still had flavor, but they were too mushy for my taste. So I add them at the 90 minute mark when I remove the foil. They hold up much better that way. We also use sweet Italian Sausage instead of spicy as that is just our preference. And if we ever have leftovers with this one, which is rare, I turn it into a sausage and potato hash with eggs for lunch the next day. Yum!!!

Enjoy!

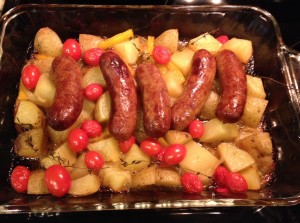
IMG_1914

Ready to eat!!

Italian Sausage Bake

Ingredients

1 pint grape tomatoes, red and/or yellow variety

1 pound honey gold potatoes, cut in to 2″ pieces

2 large bell peppers, chopped length-wise 1-inch

1 large red onion, sliced

1 tablespoon olive oil

3 cloves garlic, roughly chopped

6 links Italian sausage, sweet or spicy

5 sprigs dried thyme

salt and pepper to taste

Directions

Preheat oven to 400°F. In a large baking dish, toss potatoes, bell peppers, and red onion with one tablespoon olive oil and chopped garlic. Mix well until incorporated and salt and pepper to taste.

Place the sausage links on top of the vegetables. Place sprigs of thyme throughout the dish. Cover with foil and bake for 90 minutes.

Remove foil from baking dish, add the tomatoes, mix vegetables around, and bake for an additional 30 minutes (flipping sausages halfway) until the sausage is golden brown.

Come find me on Facebook here.

Recipe slightly adapted from Katie’s Cucina.

Fettuccine Alfredo

Just in case you don’t have enough diet busting meals to eat heading in to the holiday season, here is one more to add to the list. Fettuccine Alfredo has been a long time favorite of mine, but for some unknown reason only when eating out. I never attempted to make it from scratch (the sauce, not the fettuccine noodles), and the jarred stuff in the grocery store is pretty much inedible to me. Low and behold, this has to be one of the EASIEST meals to make, and so delicious! The taste does however come with a heavy price, in the realm of probably a weeks worth of recommended calories consumed in one meal! But hey, you only live once, right!

When I make this dish, I use half the quantities listed below. That works best for our house of two adults and two little people. If you are serving more folks, use what it listed. Also, if you have some left over chicken to use up, definitely throw it on top. This time I had a couple of cooked chicken breasts left over from the night before, so I sliced them up, and reheated them in a skillet with a little olive oil and threw the chicken on top.

The recipe is Ree Drummond’s, minus the nutmeg part. I noticed nutmeg used in a few other alfredo recipes I researched and decided to add it. Very happy I did!

IMG_1698

IMG_1696

Fettuccine Alfredo

Ingredients

1 pound fettuccine noodles

8 tablespoons butter

1 cup heavy cream

Salt and freshly ground pepper

½ teaspoon ground nutmeg

2 cups freshly grated parmesan cheese

Directions

Cook the pasta according to the package directions.

In a saucepan or skillet over low heat, warm the butter and cream. Season with salt, pepper, and nutmeg. Place half of the parmesan cheese in a large serving bowl. Pour the warm butter/cream mixture over the top. Drain the pasta (reserving some water) and immediately pour it into the bowl. Toss a couple of times, and then sprinkle in the other half of the parmesan. Toss to combine, thinning with pasta water if necessary.

Potato and Sausage Hash

If you are all about breakfast for dinner as we are, then this is a must try. Not too mention it would be a great breakfast for a weekend morning, and leave your house smelling wonderful all day long! It has all the essentials for a great dinner. Meat, potatoes, and veggies, and then throw some eggs in there and you have a pretty complete meal! When I first saw this at Tracy’s blog, scratchitcook, I knew I had to make it. I was not disappointed!

Much like my migas recipe, this is an extremely tasty meal that can be personalized with any of your favorite ingredients. Change the meat and or veggies, and you can remake this recipe to suit your family’s tastes. The only changes I made from Tracy’s original is I used EVOO to cook in verse butter. Second, I added the bell peppers in at the beginning as I like them to not have a crunch to them, but be completely softened like the onions. The sausages I stuck on the outside grill a little while before dinner, and that grill flavor really complimented the dish well.

Enjoy!

IMG_1636

Potato and Sausage Hash

Ingredients

2-3 russet potatoes, diced

1 onion, minced

1 green bell pepper, diced

2 cloves of garlic, minced

1/3 cup cheddar cheese, shredded

2 sausage links, cooked and sliced (I used Johnsonville Italian Sausage)

1 tablespoon extra-virgin olive oil

Salt and pepper to taste

Directions

In a large skillet, heat oil on medium heat. Once heated, add onion, pepper, and garlic. Cook for 3-5 minutes or until slightly softened.

Add potatoes, and stir to incorporate. Increase heat to medium-high. Cook, stirring occasionally so the potatoes don’t stick, but not too often as you want the potatoes to obtain a crispy edge. Salt and pepper to taste.

When potatoes are close to done, stir in the sausage and cook for 2-3 more minutes until the sausage is heated through. Remove pan from heat, and stir in shredded cheese.

Serve with your favorite style of eggs.

Come find me on Facebook here.

Angel Hair Pasta with Shrimp, Lemon, and Parsley

Raise your hand if you have a Fannie Farmer cookbook in your cookbook collection! I do, and it was my fathers before mine, and will one day be my son’s. I go back to it often, usually to find a tasty way to make the basics. It has taught me a lot about how to cook and bake, and I have never been disappointed with any of the recipes I have tried.

This recipe is no different. It has good, clean flavors and is very easy and quick to prepare. The flavors blend well, and if you have finicky eaters (such as my boys), this will work for them as there are no strong, bold flavors that will turn them off. Obviously, if they don’t like shrimp, you probably should pass on this one.

I like a little more pronounced lemon flavor when I eat shrimp or fish, so I added the lemon juice, which is completely optional for you.

IMG_1622

0161964-R1-E071

Just for fun, I had to throw in the above picture. Anyone remember the Fanny Farmer Candy Shops? They were born a few years after Fannie Farmer died in the early 1900’s. They spelled the first name differently, as there was no official connection between the famous chef and the candy shop. This photo was taken by my Father, I am guessing in the 70’s in Providence RI. He never missed an opportunity to take completely random photos. In this collection, he took about 7 photos of this street from all different angles. Two of them captured the candy shop, this being the better photo of the two.

Angel Hair Pasta with Shrimp, Lemon, and Parsley

Ingredients

Grated or minced zest of two lemons

Juice of one lemon (optional)

½ cup chopped parsley

1 tablespoon minced garlic

½ pound angel hair pasta

1 ½ cups low sodium chicken broth

1 pound raw shrimp, peeled and deveined

Salt and freshly ground pepper to taste

1 cup bread crumbs (non-flavored) tossed with 3 tablespoons melted butter

Directions

In a small bowl, mix together the lemon zest, lemon juice (if using), parsley, and garlic, and set aside. Bring a large pot of salted water to a boil. Add the pasta and cook until tender. Drain pasta, leaving about 1-2 tablespoons of water in the pot. Return pasta to the pot, cover, and keep warm.

Put the chicken broth in a saucepan and bring to a boil. Add the shrimp, lower the heat, and simmer for 1-2 minutes depending on the size of the shrimp, until cooked through and pink. Using a slotted spoon, remove the shrimp from the saucepan and add to the pot of pasta. Slowly add the chicken broth, one tablespoon at a time to the pasta shrimp mixture until you reach your desired consistency.

Add the lemon-parsley mixture and salt and pepper, and toss to mix well to coat the pasta. Transfer to a warm serving bowl and top with bread crumbs, or serve in individual bowls, adding bread crumbs at last minute before serving.

Slightly adapted from Fannie Farmer.


Come find me on Facebook here.